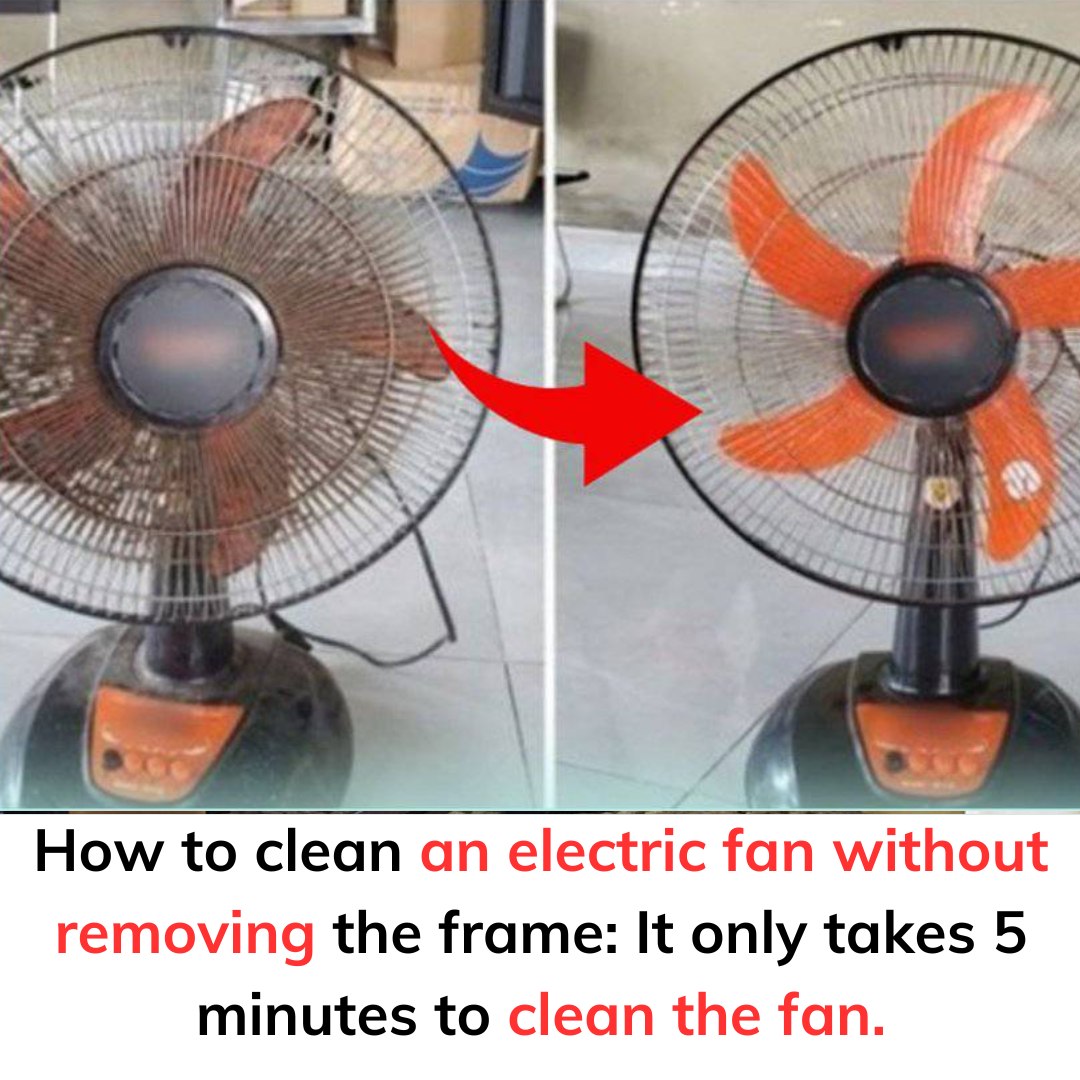
Electric fans are a household essential, especially during hot summer months. They provide much-needed relief from heat and help circulate air throughout a room. However, after prolonged use, fans inevitably accumulate dust and grime on their blades and protective grills. This not only diminishes their efficiency but also poses potential health risks as dust particles are blown into the air. While many people know they should clean their fans regularly, the idea of disassembling and reassembling them can feel daunting. Fortunately, there’s an easy and effective way to clean an electric fan without taking it apart or using water—and the results might surprise you.

1. Cleaning the Fan Blades Without Disassembling or Washing
Traditional fan cleaning methods typically involve disassembling the fan, removing the blades, and scrubbing each part individually. While effective, this process can be time-consuming and intimidating for those unfamiliar with appliance maintenance. Luckily, there’s a much simpler approach using common household ingredients that can leave your fan spotless without the hassle of taking it apart.
Materials You’ll Need:
- 1 small bowl
- 1 spray bottle
- 250ml water
- 2 teaspoons baking soda
- A few drops of dishwashing liquid
- 1 teaspoon white vinegar
Step 1: Prepare the Cleaning Solution
Start by adding two teaspoons of baking soda and one teaspoon of white vinegar into a bowl. Next, add two to three drops of dishwashing liquid. Stir the mixture with a chopstick or spoon until it creates a foamy consistency. Make sure the baking soda is fully dissolved in the liquid. Once mixed, transfer the solution into a spray bottle.
Step 2: Spray the Fan Blades
Before cleaning, always unplug the fan to avoid electrical hazards. Spray the cleaning solution generously on both the front and back of the fan blades. The combination of vinegar and dishwashing liquid works to dissolve stubborn grime, while baking soda’s natural bleaching properties help lift away tough stains.
Step 3: Let the Solution Sit
Allow the cleaning solution to sit on the blades for about 10 minutes. This gives it enough time to break down accumulated dirt and grime. The mixture will also sanitize the fan blades, removing bacteria and odors caused by trapped dust.
Step 4: Let the Fan Do the Work
After letting the cleaning solution settle, plug the fan back in and turn it on at a medium speed. The spinning motion of the blades will cause the cleaning mixture to spread evenly across the surface, loosening dirt and flinging it away. You might notice small black specks of dirt scattering as the fan spins—that’s the stubborn grime being cleared away.
This method is not only quick and efficient but also saves you the trouble of dismantling the fan. In just a few minutes, you’ll notice a significant improvement in the fan’s cleanliness and airflow.
2. How Often Should You Clean an Electric Fan?
Regular maintenance is crucial for the longevity and efficiency of your electric fan. Experts generally recommend cleaning fans two to three times a year. However, the actual frequency may vary depending on environmental conditions and usage.
- Low-Dust Environments: If you live in an area with minimal dust, cleaning your fan twice a year—once at the beginning of the hot season and once at the end—should suffice.
- High-Dust Environments: In dustier regions or heavily polluted areas, it’s better to clean your fan monthly during peak usage seasons and at least every three months during cooler months when the fan is used less frequently.
Regular cleaning not only keeps the fan blades dust-free but also ensures smooth operation, reduces motor strain, and helps prevent potential overheating. Clean blades and vents allow the fan to circulate air more efficiently, keeping your home cooler with less effort.
3. Benefits of Regular Fan Cleaning
Aside from improving performance, regular fan maintenance has additional benefits. Dust buildup on fan blades doesn’t just make the appliance less effective—it also impacts indoor air quality. When dust and allergens are continuously blown around a room, they can trigger allergies, asthma, and other respiratory issues.
Moreover, regular cleaning reduces wear and tear on the motor and internal components, extending the lifespan of your fan. A well-maintained fan operates more efficiently, consumes less energy, and delivers better airflow, saving you money on electricity bills in the long run.
4. Tips for Maintaining a Clean Fan Year-Round
- Use Dust Covers: When not in use, cover your fan with a dust cover to prevent dirt buildup.
- Vacuum Regularly: Use a handheld vacuum with a brush attachment to remove dust from the fan grill.
- Keep the Surrounding Area Clean: Ensure the area where the fan operates is clean and dust-free to minimize dirt accumulation.
- Inspect for Damage: Periodically check for loose screws, frayed power cords, or faulty switches to prevent mechanical failures.
By incorporating these simple habits into your household routine, you can keep your fan operating smoothly year-round with minimal effort.
5. Final Thoughts
Electric fans are a staple in most homes, but they often don’t get the care and attention they deserve. Dirt and grime buildup not only affect their performance but also pose health risks for your family. Fortunately, you don’t need to be an expert handyman or spend hours dismantling your fan to clean it effectively.
With a simple homemade cleaning solution and a few easy steps, you can keep your fan blades spotless and your home air cleaner. Regular maintenance doesn’t just keep your fan looking good—it ensures optimal performance, reduces energy consumption, and extends its lifespan.
So, don’t wait for your fan to become a dusty eyesore. Take a few minutes, prepare your cleaning solution, and give your fan the care it deserves. You’ll be surprised at how much of a difference a clean fan can make in both air quality and cooling efficiency.


