ChatGPT đã nói:
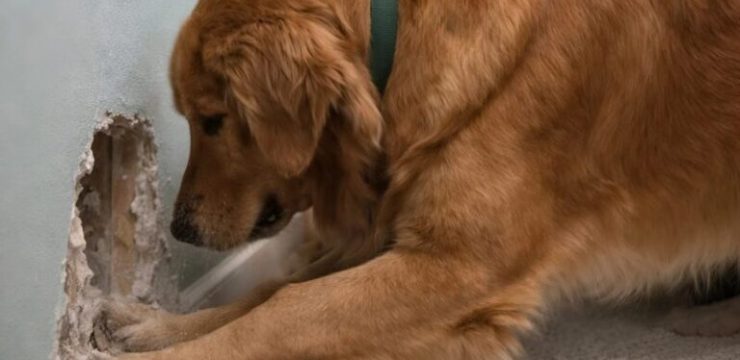
Dealing with a pet who has no respect for rugs can be a real headache, especially when it leads to ruined flooring. That’s exactly the situation my husband and I found ourselves in thanks to our cat, Lucky. If you’ve ever owned a cat, you might understand how they can single-handedly destroy any floor covering you put down, no matter how sturdy or uninviting it seems.
We had a big entryway mat that was rubbery with a pattern of gaps and swirls, something you’d think would be completely unappealing for any pet to use as a bathroom spot. But no, Lucky managed to precariously balance himself just right to do his business on it anyway, which eventually damaged the laminate flooring underneath beyond repair. After seeing more and more of our entry floor ruined, I finally reached my limit. I was genuinely worried about the subfloor being compromised, and something had to be done. Our entry is the main way we come into the house, so we needed a floor solution that could stand up to wet and muddy shoes and still look good.
We do plan on installing beautiful hardwood flooring throughout the main level one day, but that’s a costly project we’re not ready to tackle yet. Plus, I wanted something that could handle the wear and tear better than the laminate we currently had. So I started thinking about alternatives to a traditional entry rug. My husband and I both dislike the look of most tiled entries—they either look outdated or just don’t fit our taste. But then I remembered what we’d done in our kitchen: we used hexagon porcelain tiles that blended seamlessly with the laminate, cutting out sections of the old floor and installing the tiles like pieces of a puzzle. I thought, why not do something similar here at the entry? This way, we could keep the flooring consistent without adding too many different materials on the same level. The tiles I chose are durable, easy to clean, and have enough texture to prevent slipping.
The plan was to cover just enough of the floor to act like a rug, protecting the area from dirt and damage—and, of course, covering up the ruined laminate. Since I already had most of the supplies leftover from previous projects, this ended up being a pretty budget-friendly fix. The only thing I had to buy was the tile, which cost a little over $100. The entire project was estimated at around $250 if you had to buy everything from scratch. Here’s what I used: hexagon floor tiles from Mission Stone & Tile, waterproof membranes (AquaDefense and Schluter Kerdi), rapid-setting thin-set mortar, grout, and caulk.
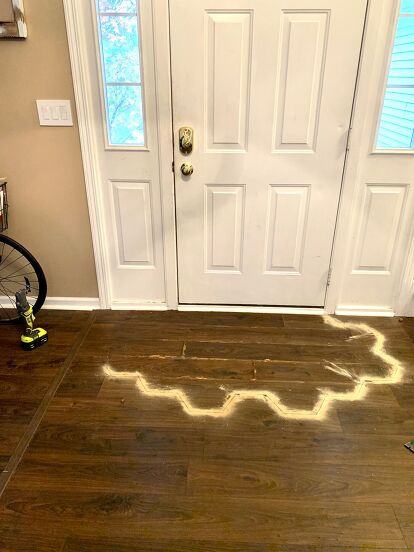
The first step was planning the tile layout. My four-year-old and I had a fun time arranging the tiles into different shapes, but ultimately, I decided to lay the tiles directly over the damaged section after cleaning it as well as possible. I spaced the tiles exactly how I wanted the grout lines to be and left a spot to cut tiles for the edges near the door. Once satisfied with the layout, I traced the tiles’ edges on the floor with a Sharpie, allowing some extra room for adjustments and for caulking later on. Next came the dirty part: cutting out the old flooring along the traced lines. Using an oscillating saw, which I love for precise cuts especially around the hexagon corners, I carefully removed the damaged laminate. For straight cuts, a circular saw works well, but mine wasn’t working at the time. After cutting, I pried up the old boards, cleaned the area, and tossed the ruined flooring in the trash. Then it was time to waterproof the exposed subfloor. In the kitchen, I’d used the more expensive Schluter Ditra membrane for full waterproofing, but for this small entryway, I opted for a thinner Schluter Kerdi membrane with a few coats of AquaDefense liquid membrane on top.
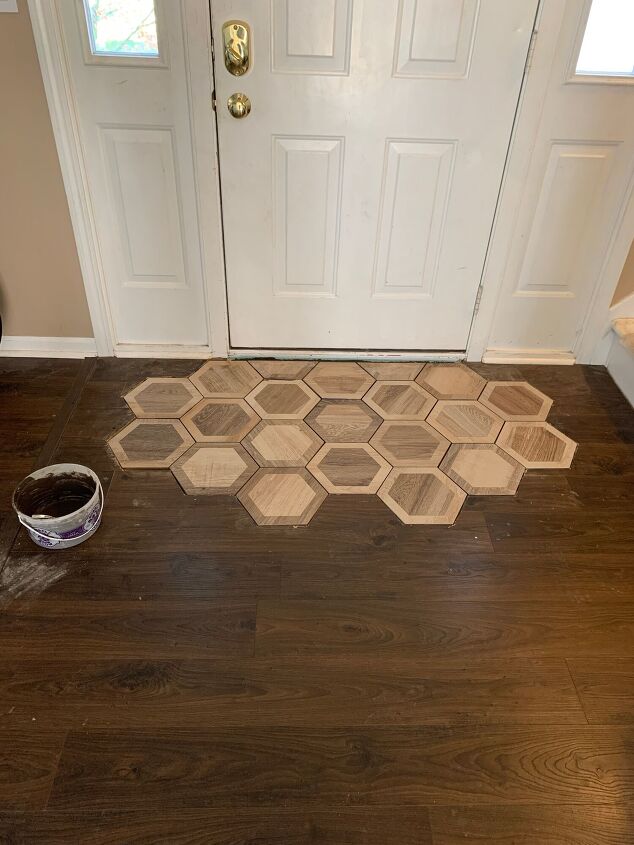
This combo was easier on the budget and effective. I applied the Kerdi membrane, then painted on the AquaDefense with a disposable brush, making sure to cover the area under the door to prevent future moisture damage. Once the waterproofing was dry, I mixed rapid-setting thin-set mortar in an old ice cream bucket with a paint stir stick—yes, very professional tools! I spread the mortar evenly over the area, enough to cover the floor but not too thick. Then I started placing the tiles one by one, pressing them firmly into the mortar and spacing them evenly for grout lines. For the edge tile near the door, I took it to the garage and cut it in half with a rented tile saw, fitting the pieces perfectly to complete the puzzle. After laying all the tiles, I made sure no pets or kids stepped on them until they set overnight. The next day, I mixed grout and filled in all the gaps between the tiles. Grouting requires patience, as you have to be sure all spaces are filled with no air pockets. I left the larger gaps between the tile edges and the existing floor for caulk later, since caulk flexes better and handles floor movement. Grouting always makes a mess, but after letting it sit for a while, I wiped off the excess with a damp sponge.
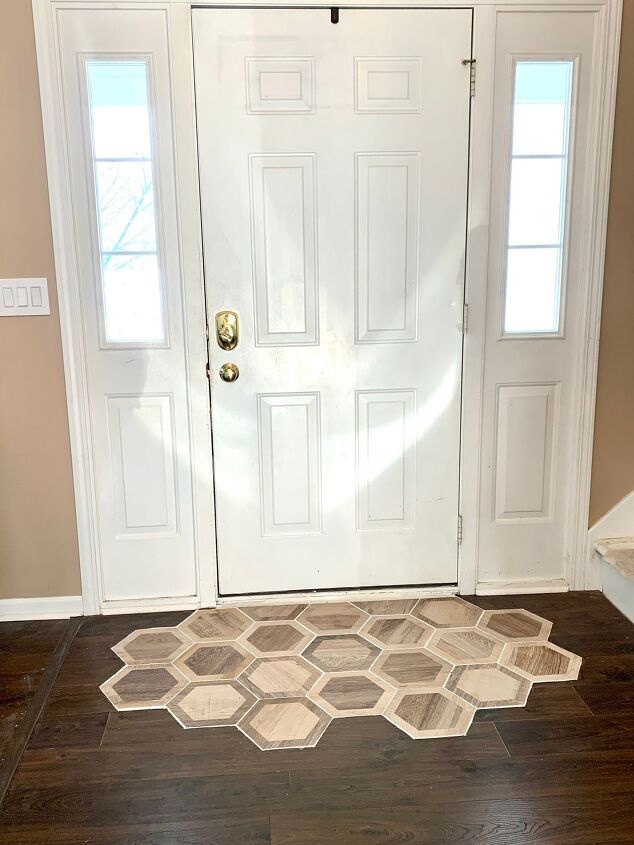
Here’s a tip I discovered: when grout film remains even after wiping, baby wipes do an amazing job of scrubbing it off. Finally, I caulked the edges where the tile meets the old floor and along the door threshold, using white caulk that matched the grout to blend it all seamlessly. Smoothing the caulk with a baby wipe helped hide any imperfect cuts or gaps. And that was it! Instead of a ruined floor beneath a rug, we now have a durable and stylish tiled entry that can stand up to snow-covered boots, muddy shoes, and all the mess life throws at it. Best of all, I don’t have to worry about our cat ruining the floor anymore, which is a huge relief.